Step by step guide for Object Analytics
This guide is a step by step guide on how to configure, activate and test alerts from object analytics.
Add event based supervision on a service recipient
Log in as service responsible
Navigate to the service recipient
Go to “Camera supervision”
Under “Event-based supervision” choose “ Add event-based supervision”

Choose the event type that you want to add
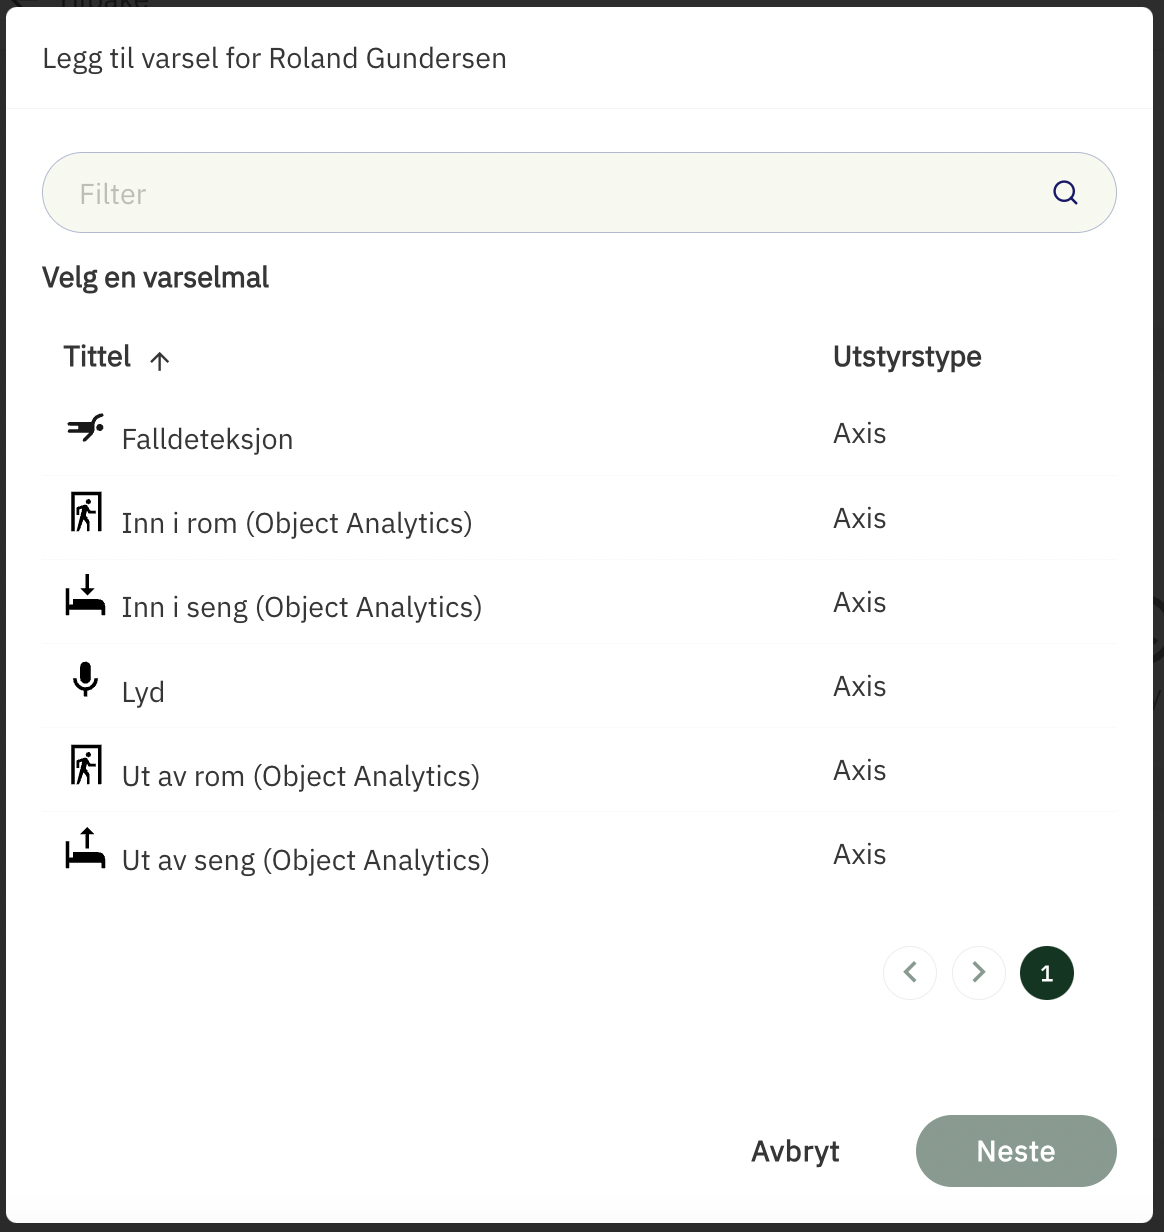
Fill inn the necessary information
Description: Description of the supervision
Display text: The text that is visible in the alarm card
Alarm icon: The icon that is visible in the alarm card
Priority: Priority of the event
Time period: The time that the event-based supervision should be active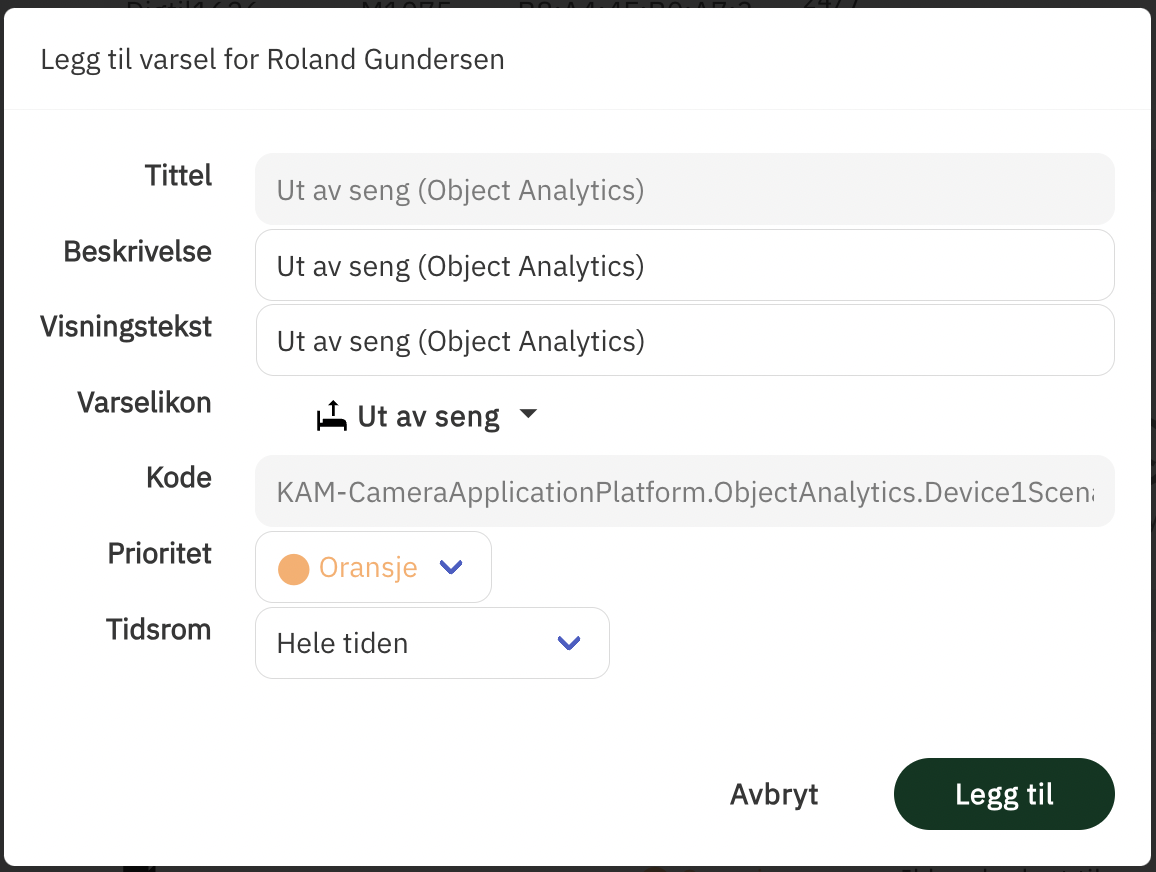
If a time period is selected:
Applies from: The time that it should start
Applies to: The time that it should end
Days: The days it should apply to
Press “Add”, the event-based supervision is now active

How to add event-based supervision in Tellucare
Configuring masks in Object analytics
Log in as service responsible
Navigate to the service recipient
Go to “Camera supervision”
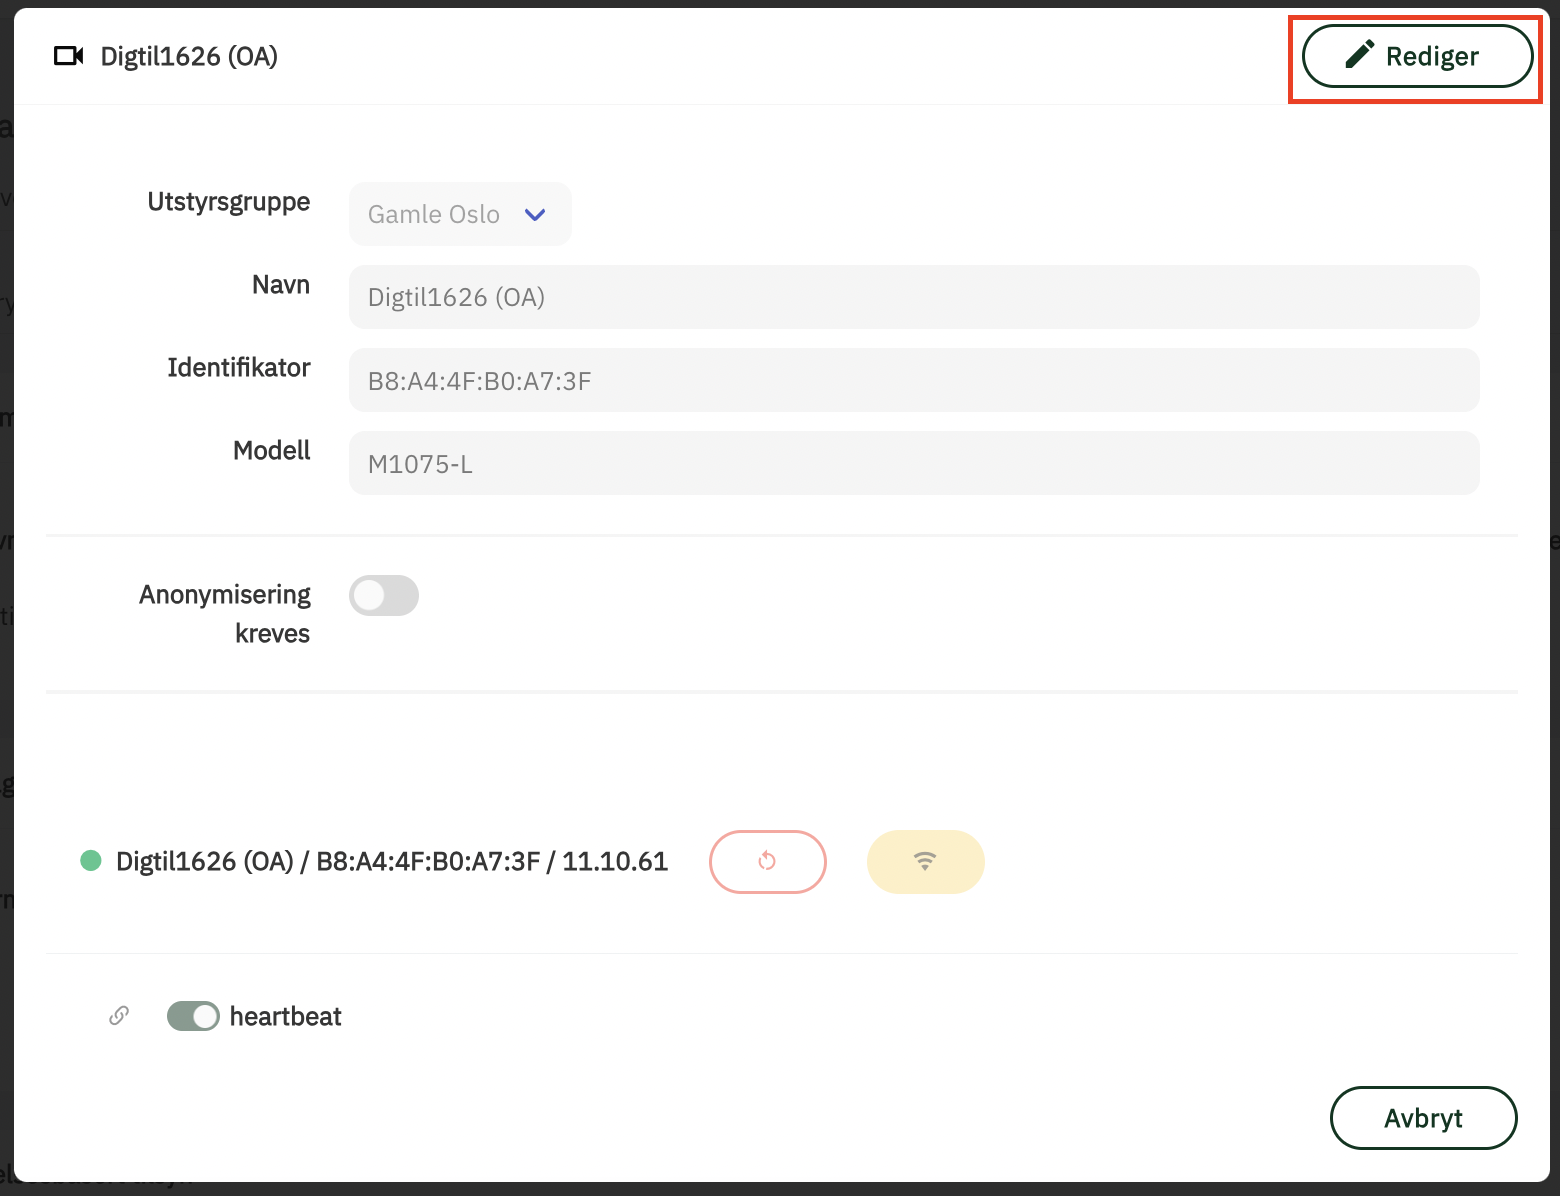
Press the arrow to the right of the camera

Press “Edit”
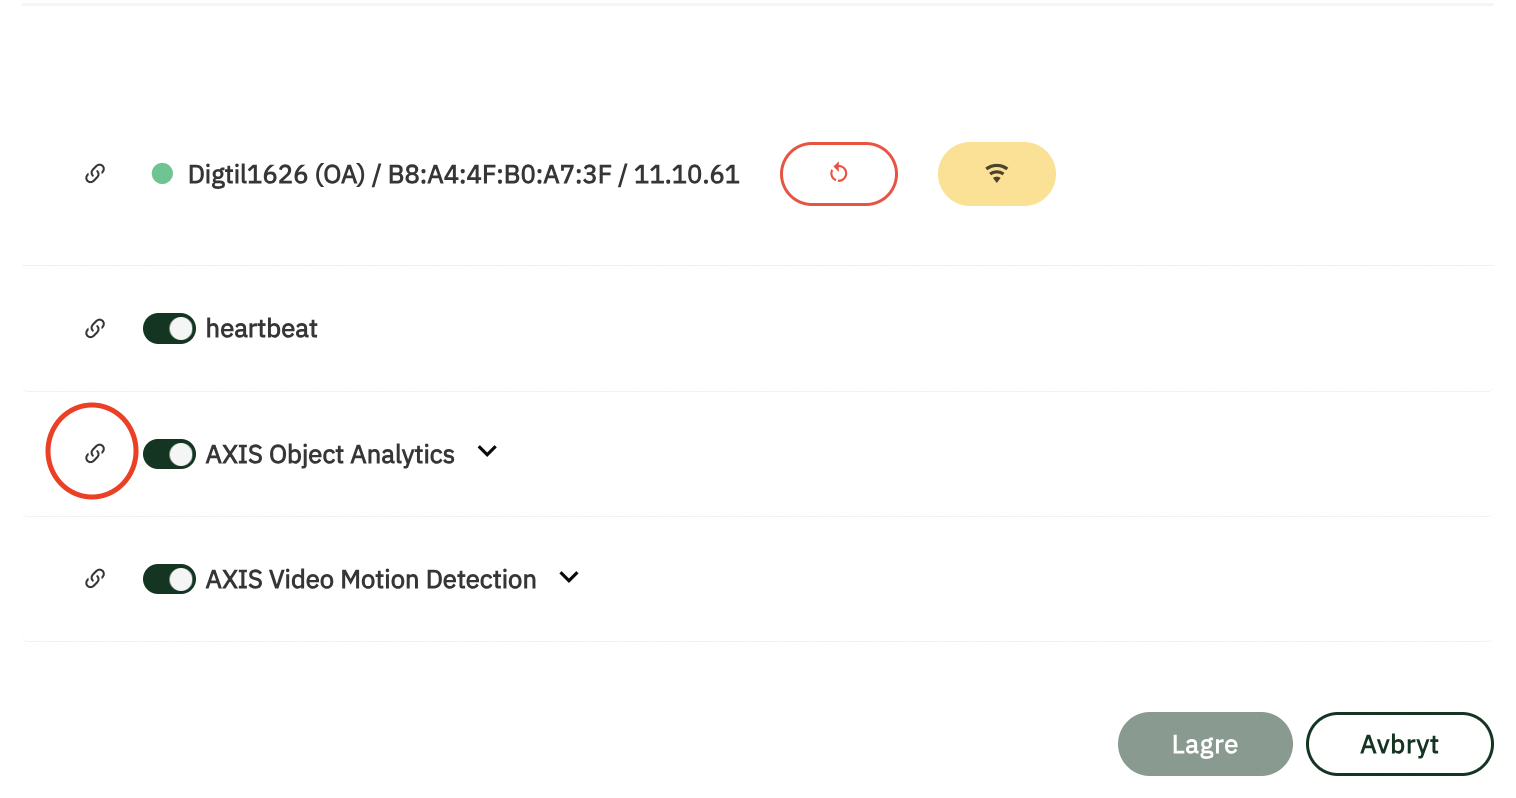
Scroll down to the icon next to Object Analytics and press it
You will now be sent to this page
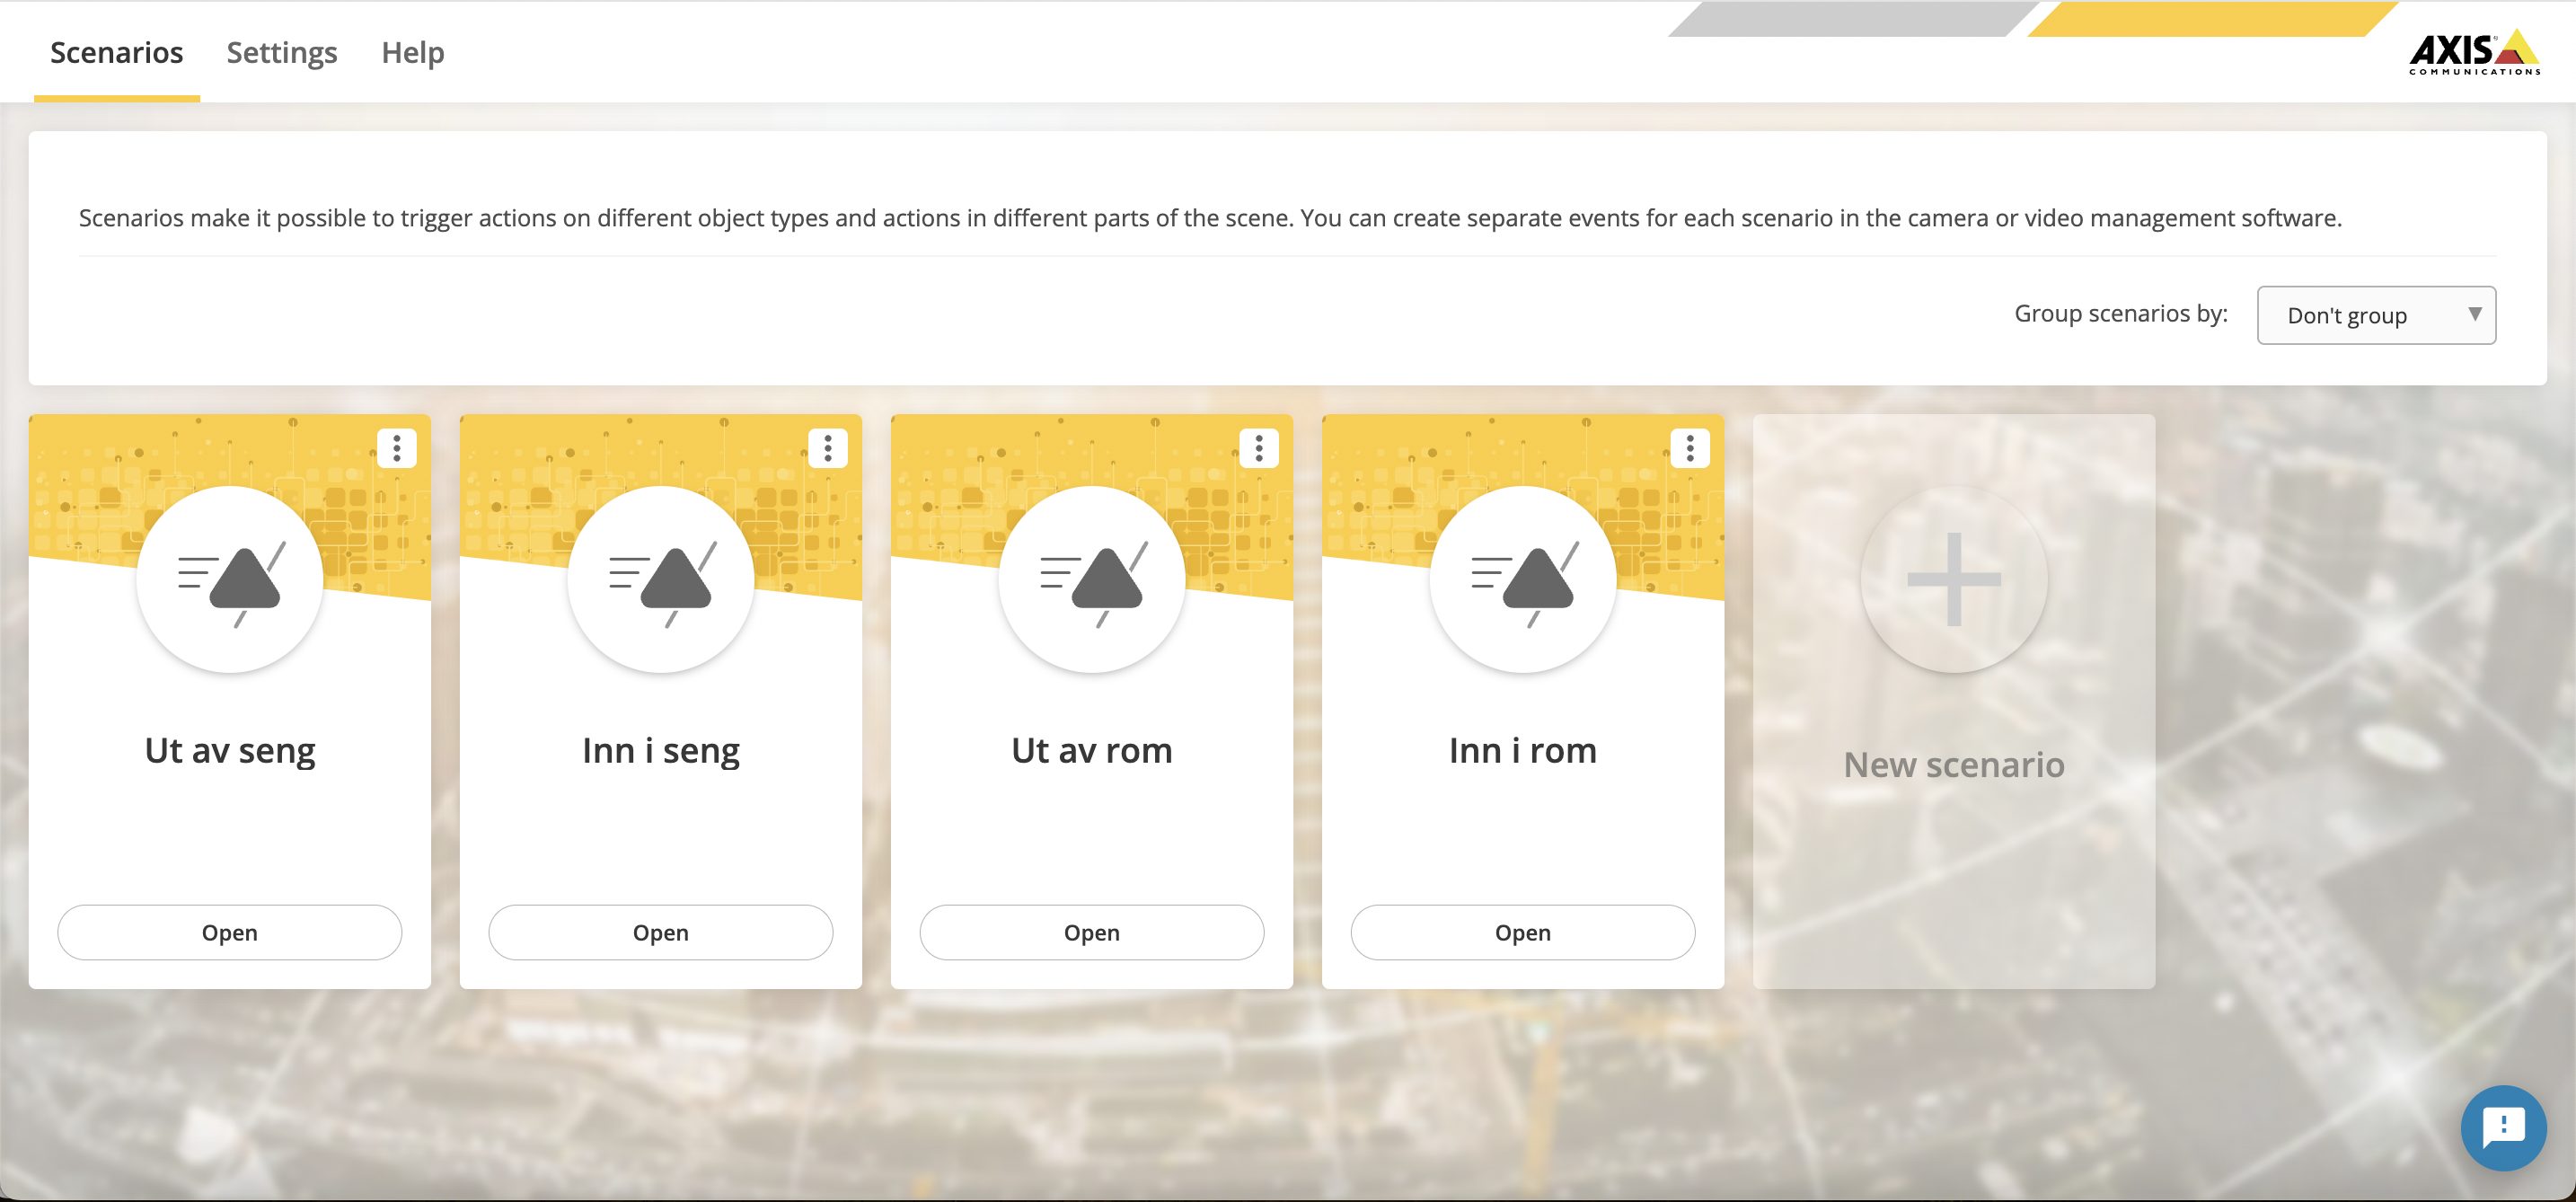
Choose the relevant scenario
You can now move the masks around the way you want the event to trigger (PS! It is important to make sure the direction is pointing in the direction you want the event to trigger).
For more information on setting masks in Object Analytics
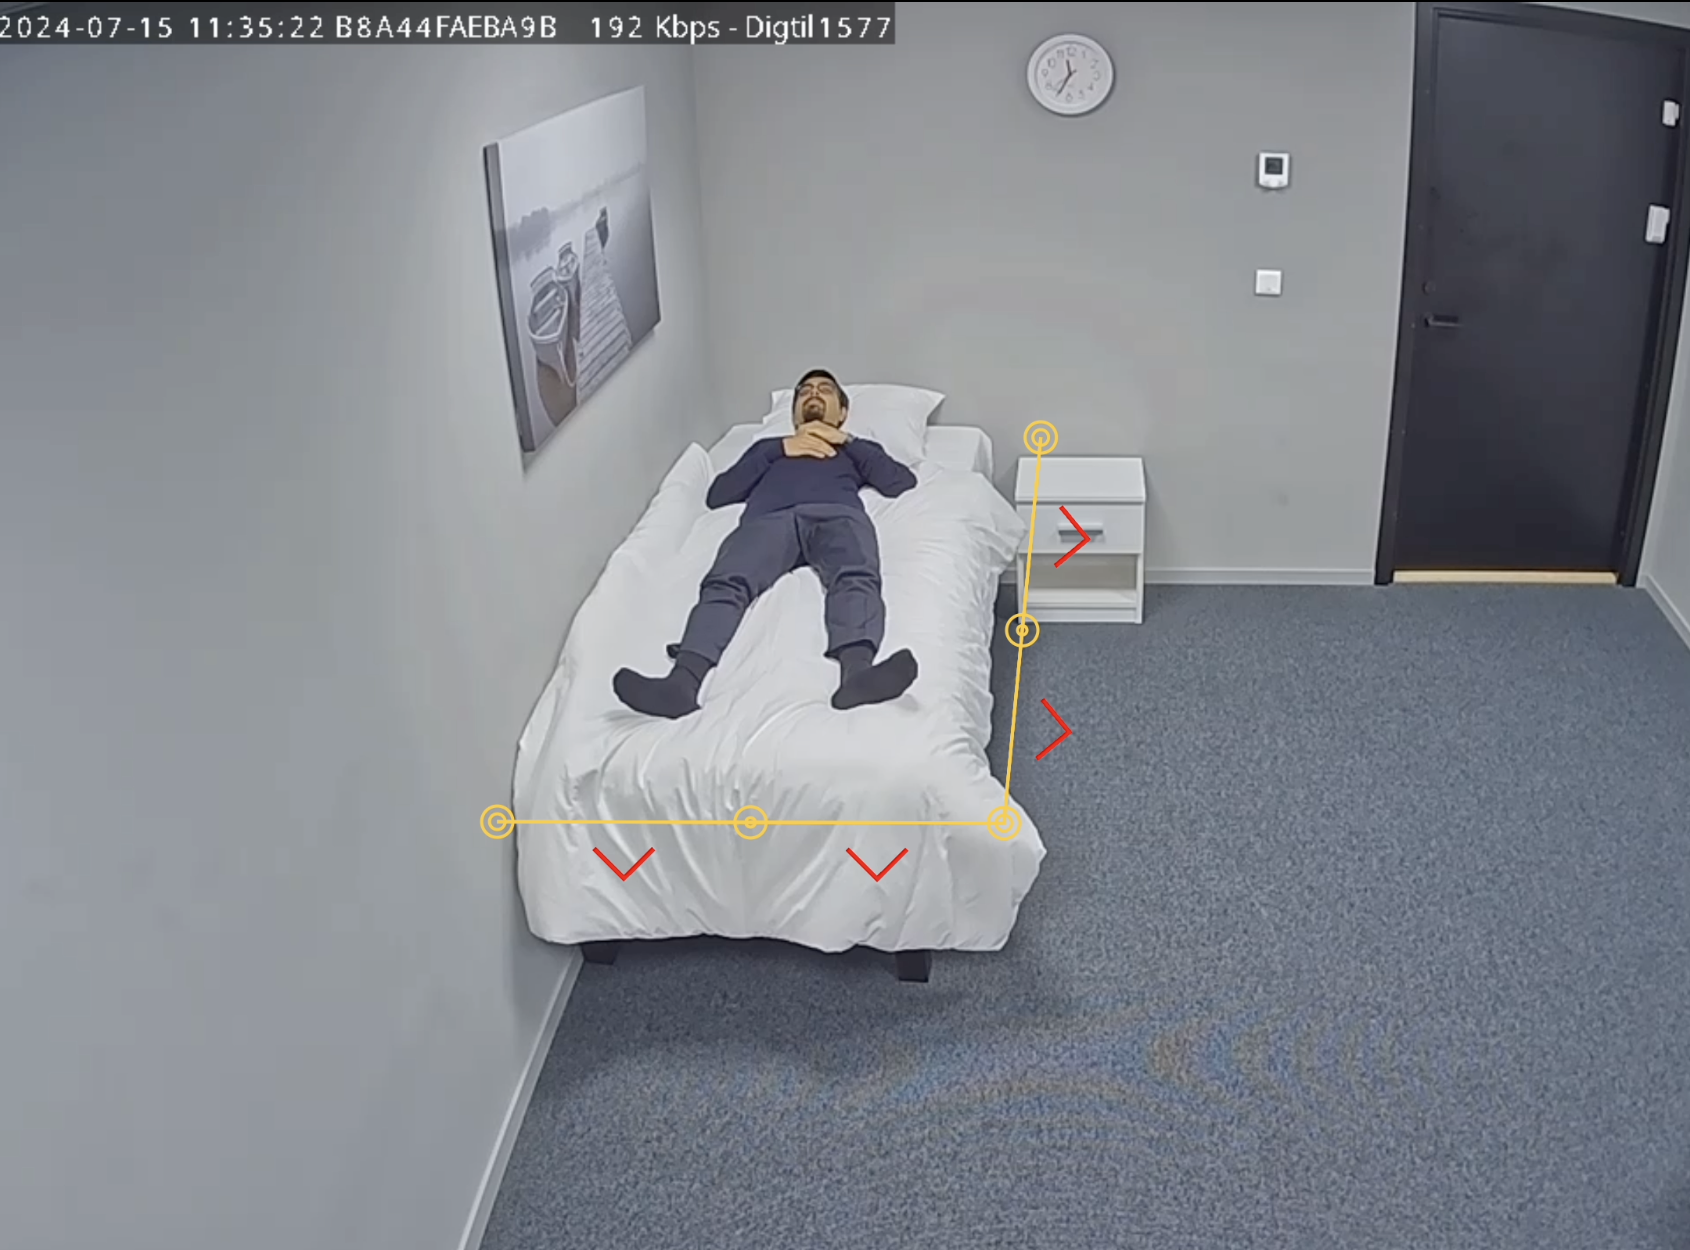
Testin alerts
Log in as service responsible
Navigate to the service recipient
Go to “Camera supervision”
Click the arrow to the right of the camera

Click edit

Scroll down to Object analytics and expand. Here you will see all possible alerts with Object Analytics. When you have added an alert to the service recipient you will get the option to “Send event” next to the event type. Click this.
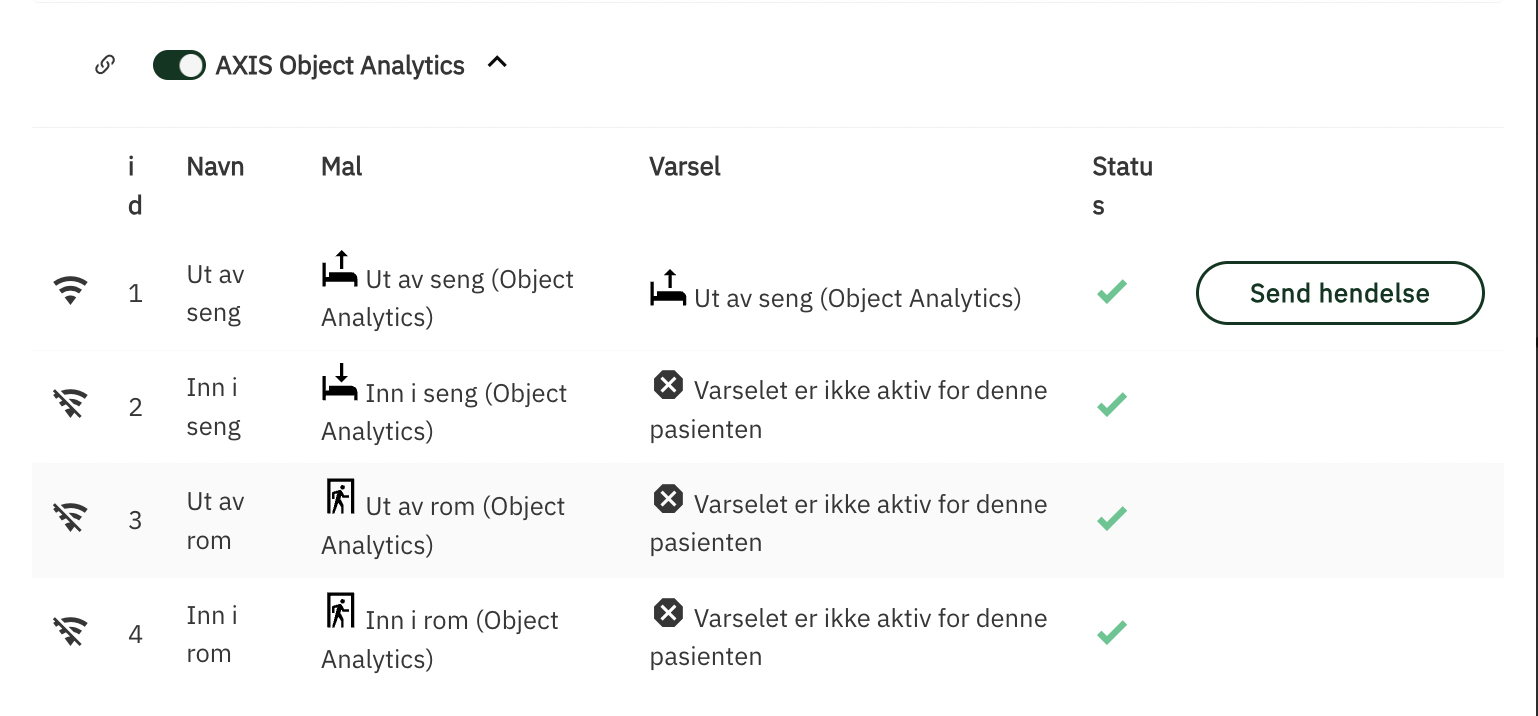
Confirm the action

Go to “Event log” and see that the event was received correctly

PS! It is also possible to send a test alarm from Object Analytics when editing masks.


